Step-by-Step Guide to Using Your Ultrasonic Jewelry Cleaner

Ultrasonic jewelry cleaners have revolutionized how you maintain your precious pieces. These devices use high-frequency sound waves to remove dirt and grime, reaching even the most intricate designs. Proper cleaning is crucial for keeping your jewelry sparkling and in top condition. Surprisingly, 52% of people only clean their jewelry when it looks dull. Regular use of a jewelry ultrasonic cleaner can prevent this, ensuring your treasures always shine. Remember, though, over-cleaning can harm finishes, so balance is key.
Preparing for Cleaning with Your Jewelry Ultrasonic Cleaner
Before diving into the cleaning process, it's essential to prepare properly. This ensures that your jewelry ultrasonic cleaner works effectively and safely.
Understanding Your Jewelry Ultrasonic Cleaner
Components and Features
Your jewelry ultrasonic cleaner is a marvel of modern technology. It typically includes a tank, a control panel, and sometimes a heating element. The Creworks 180W Ultrasonic Cleaner offers a 1.6-gallon basin and a digital control panel, making it user-friendly. The Digital Ultrasonic Cleaner provides various cleaning modes and adjustable timer settings, allowing you to tailor the cleaning process to your needs. These features ensure thorough cleaning by using high-frequency sound waves to create microscopic bubbles that remove dirt and grime.
Safety Precautions
Safety should always come first. Always read the manual that comes with your jewelry ultrasonic cleaner. Avoid overfilling the tank, and never submerge the control panel in water. Some cleaners, like the Professional Ultrasonic Cleaner, have an automatic shut-off feature, which is a great safety measure. Ensure the device is on a stable surface to prevent spills or accidents. Remember, using the right cleaning solution is crucial to avoid damaging your jewelry or the cleaner itself.
Selecting Jewelry for Cleaning
Safe Materials
Not all jewelry is suitable for ultrasonic cleaning. Metals like gold, silver, and platinum are generally safe. The Ultrasonic Jewelry Cleaner is designed to restore the luster of these valuable pieces. Hard gemstones such as diamonds, sapphires, and rubies can also be cleaned safely. Always ensure that the stones are securely set before cleaning.
Materials to Avoid
Certain materials should never go into a jewelry ultrasonic cleaner. Soft gemstones like opals, pearls, and emeralds can get damaged. Jewelry with glued-in stones or antique pieces with delicate settings should also be avoided. The ultrasonic waves can loosen the glue or damage fragile components.
Choosing the Right Cleaning Solution
Recommended Solutions
Choosing the right cleaning solution is vital for effective cleaning. A small amount of citrus-based dish soap can work well if you don't have a professional cleaning concentrate. Some users recommend adding a tablespoon of ammonia to the water, but use it sparingly. The Ultrasonic Cleaner for Jewelry uses a liquid solution to enhance the cleaning action, ensuring your jewelry comes out sparkling.
Solutions to Avoid
Avoid harsh chemicals or abrasive cleaners. These can damage both your jewelry and the ultrasonic cleaner. Solutions with bleach or chlorine should never be used, as they can cause discoloration or corrosion. Regularly changing the cleaning solution helps maintain its effectiveness and prolongs the life of your jewelry ultrasonic cleaner.
By understanding your jewelry ultrasonic cleaner and preparing correctly, you ensure that your precious items receive the best care possible. This preparation sets the stage for a successful cleaning process, keeping your jewelry looking its best.
The Cleaning Process Using a Jewelry Ultrasonic Cleaner
Now that you're ready to dive into the cleaning process, let's walk through each step to ensure your jewelry ultrasonic cleaner works its magic.
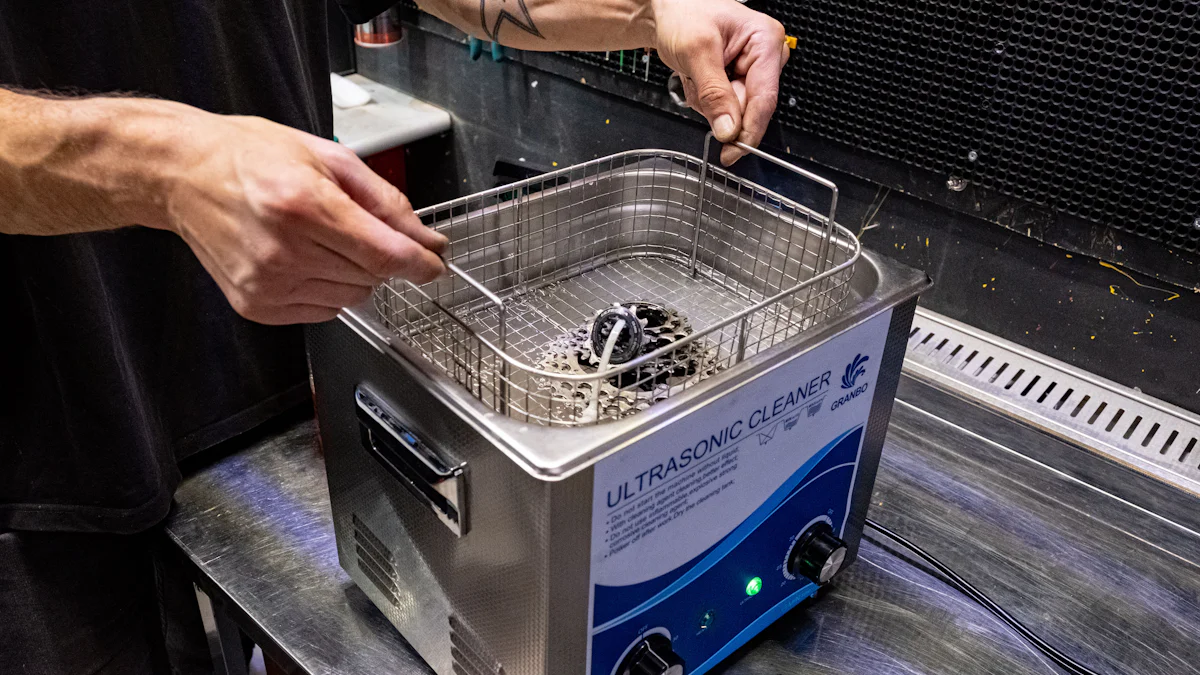
Setting Up the Cleaner
Filling the Tank
First things first, fill the tank of your jewelry ultrasonic cleaner with water. Make sure you don't overfill it. You want enough water to cover your jewelry completely but not so much that it spills over. If you're using a cleaning solution, add it now. A small amount of citrus-based dish soap or a professional cleaning concentrate works wonders. Remember, the right solution enhances the cleaning action by creating those tiny bubbles that scrub away dirt and grime.
Adjusting Settings
Next, adjust the settings on your jewelry ultrasonic cleaner. Most models have a timer and sometimes a temperature control. Set the timer based on how dirty your jewelry is. For lightly soiled pieces, a few minutes might suffice. For more stubborn grime, you might need up to 20 minutes. If your cleaner has a heating option, use it to boost the cleaning power. Just be cautious with heat-sensitive stones.
Cleaning Your Jewelry
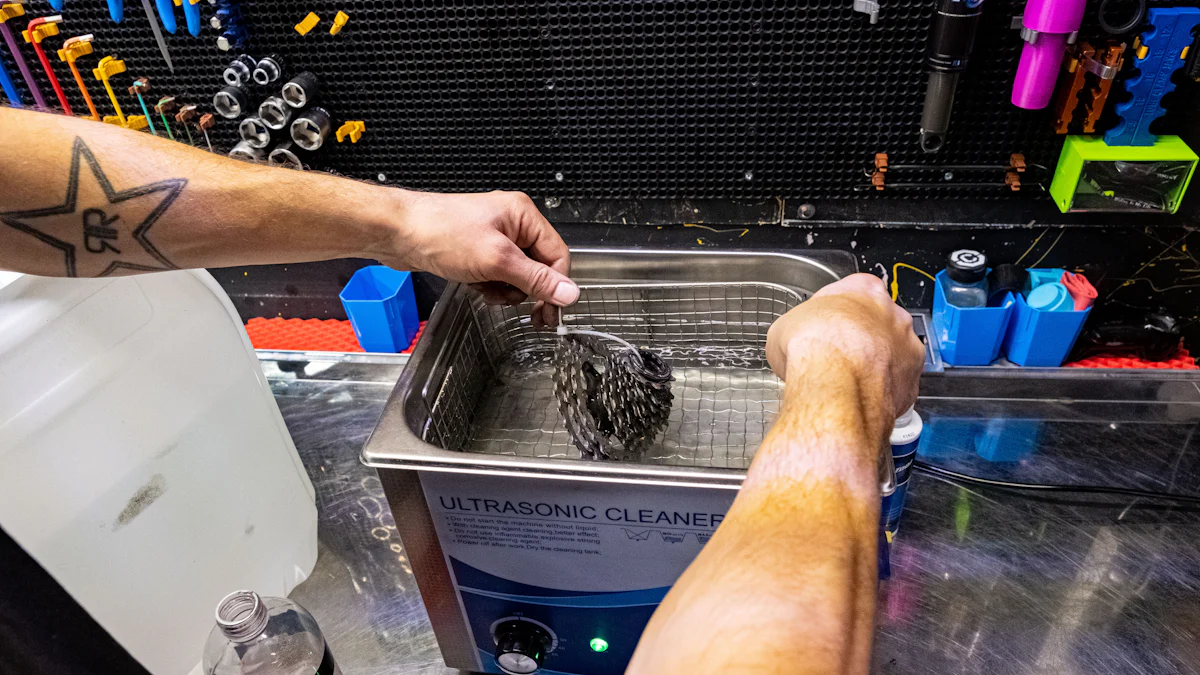
Placing Jewelry in the Cleaner
Carefully place your jewelry in the cleaner's basket. Make sure pieces don't touch each other or the tank's sides. This ensures maximum cavitation, allowing those microscopic bubbles to reach every nook and cranny. If you're cleaning multiple items, space them out evenly.
Running the Cleaning Cycle
Once everything is set, start the cleaning cycle. You'll hear a gentle buzzing sound as the high-frequency sound waves create cavitation. This process is both efficient and gentle, making it ideal for delicate jewelry. Sit back and let the jewelry ultrasonic cleaner do its job. In just a few minutes, your pieces will emerge looking refreshed and sparkling.
Post-Cleaning Steps
Rinsing and Drying
After the cycle completes, remove your jewelry from the cleaner. Rinse each piece under warm water to wash away any remaining cleaning solution. This step is crucial to prevent residue buildup. Once rinsed, gently pat your jewelry dry with a soft cloth. Avoid using paper towels, as they can scratch delicate surfaces.
Inspecting for Residue
Finally, inspect your jewelry for any leftover residue. Pay close attention to intricate designs and behind gemstones. If you spot any remaining dirt, you might need to run another cycle or use a soft brush for a gentle scrub. Regular inspection ensures your jewelry stays in top condition.
By following these steps, you harness the full potential of your jewelry ultrasonic cleaner. This method not only saves time but also protects your precious pieces from harsh chemicals and manual scrubbing. Enjoy the satisfaction of seeing your jewelry shine like new!
Post-Cleaning Care
Taking care of your jewelry and ultrasonic cleaner after the cleaning process is crucial. Let's dive into how you can keep everything in top shape.
Storing Your Jewelry
Proper Storage Techniques
Storing your jewelry correctly ensures it stays beautiful and damage-free. Use soft pouches or lined jewelry boxes to prevent scratches. Keep pieces separate to avoid tangling or abrasion. This simple step helps maintain their shine and integrity.
Avoiding Damage
Avoid exposing your jewelry to harsh chemicals or extreme temperatures. Remove jewelry before swimming or using cleaning products. These precautions protect delicate finishes and settings, ensuring longevity.
Maintaining Your Ultrasonic Cleaner
Regular Cleaning of the Device
Regular maintenance of your ultrasonic cleaner keeps it running smoothly. After each use, empty the tank and wipe it down with a soft cloth. This prevents residue buildup and ensures optimal performance. A clean device means better results for your jewelry.
Troubleshooting Common Issues
Sometimes, issues may arise with your ultrasonic cleaner. If it’s not working properly, check the power source and settings. Ensure the tank is filled correctly. If problems persist, consult the manual or contact customer support. Keeping your device in good condition ensures it continues to deliver satisfying results.
Testimonial:
“The ultrasonic cleaner is easy to maintain and so efficient that it speeds up the cleaning process.” – Dana Hofer Brass Instrument Repair
By following these post-cleaning care tips, you ensure both your jewelry and ultrasonic cleaner remain in excellent condition. Enjoy the lasting brilliance of your precious pieces!
You've now mastered the art of using your ultrasonic jewelry cleaner. Here's a quick recap:
Prepare: Understand your cleaner and choose the right jewelry and solution.
Clean: Set up, run the cycle, and rinse thoroughly.
Care: Store jewelry properly and maintain your cleaner.
Regular cleaning keeps your jewelry sparkling and prevents damage. Make it a habit to enjoy lasting beauty and value. Your treasures deserve the best care, so keep them shining bright!
See Also
Guide on Safely Taking Off Earrings at Home
Cleaning Lab Grown Diamonds: A How-To
Choosing a White Diamond Ring: Step-by-Step Tips
